
Estimating Wiring Accessories Costs
Is the thought of rewiring your home sending shivers down your spine, not just from the electrical current, but the potential cost? You’re not alone. Many homeowners dread the uncertainty of budgeting for electrical work, especially when it comes to all those seemingly small, but essential, wiring accessories.
Understanding how to estimate the costs of these accessories is crucial for accurate project budgeting and avoiding unwelcome financial surprises. A well-planned budget, factoring in every connector, box, and plate, empowers you to manage your project effectively, whether you're handling the installation yourself or hiring a qualified electrician. Taking the time to understand the nuances of wiring installation costs can save you money and ensure a safer, code-compliant electrical system.
Here’s a practical tip: before you even start pricing individual items, walk through your project area room by room. Make a detailed list of every switch, outlet, light fixture, and appliance you plan to install or replace. This comprehensive inventory will be your roadmap to accurate accessory estimation.
Wiring Accessories Cost Estimation: A Comprehensive Guide
When tackling any electrical project, from adding a simple outlet to completely rewiring a room, it's easy to focus on the big-ticket items like wiring cable itself and overlook the cumulative cost of the smaller components. However, these accessories – connectors, boxes, faceplates, and more – add up quickly and can significantly impact your overall budget. This guide provides a clear and practical approach to estimating these costs, ensuring a smoother and more predictable project.
Understanding the Categories of Wiring Accessories
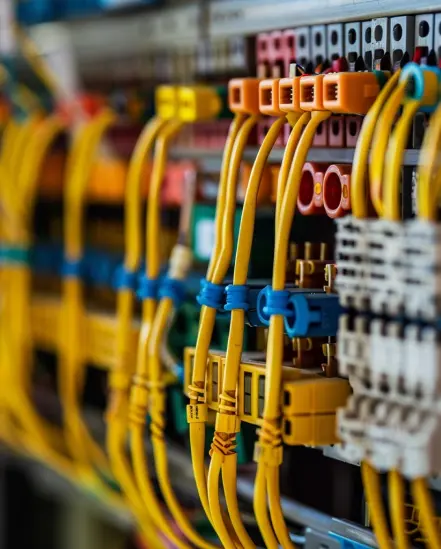
To effectively estimate costs, it's helpful to categorize the different types of wiring accessories. Here are some of the most common categories you'll encounter in a typical home wiring project: Connectors and Terminals: These include wire connectors (like wire nuts or Wago connectors), grounding clips, cable staples, and terminal strips. They ensure secure and safe electrical connections. Electrical Boxes: These protect wiring connections and provide a mounting point for switches, outlets, and light fixtures. They come in various materials (plastic, metal) and sizes (single-gang, multi-gang). Wall Plates and Covers: These aesthetically cover electrical boxes and switches/outlets. They are available in different materials (plastic, metal, stainless steel) and finishes to match your décor. Conduit and Fittings: If your wiring requires protection from physical damage, you'll need conduit (rigid or flexible tubing) and related fittings like connectors and couplings. This is more common in unfinished basements, garages, or outdoor applications. Mounting Hardware: This includes screws, straps, clamps, and other hardware used to secure wiring, boxes, and fixtures in place. Miscellaneous: This category encompasses items like cable ties, labels, electrical tape, and other small but necessary items for a neat and code-compliant installation.
Factors Influencing the Cost of Wiring Accessories
Several factors affect the price of wiring accessories. Understanding these factors will allow you to make more informed decisions and potentially save money: Material: The material of the accessory significantly impacts its cost. Metal boxes and plates are generally more expensive than plastic ones. Similarly, copper connectors are pricier than aluminum ones. Quality and Brand: Higher-quality accessories from reputable brands typically cost more but offer better performance, durability, and safety. Don't skimp on quality when it comes to electrical safety. Quantity: Buying in bulk can often result in significant savings, especially for larger projects requiring many of the same accessories. Location: Prices can vary depending on your location and the retailer you choose. Compare prices at local hardware stores, electrical supply houses, and online retailers. Code Compliance:Always ensure that the accessories you choose are code-compliant and suitable for the intended application. Using non-compliant materials can lead to safety hazards and costly rework.
Estimating Accessory Costs: A Step-by-Step Approach
Now, let's break down the process of estimating accessory costs into manageable steps:
1.Create a Detailed Inventory: As mentioned earlier, start by creating a comprehensive list of all the electrical devices you plan to install or replace. Include the quantity and type of each device (e.g., 10 standard outlets, 5 dimmer switches, 3 ceiling fans).
2.Determine Accessory Needs for Each Device: For each device on your list, determine the specific accessories required for installation. For example, a standard outlet typically requires an electrical box, wire connectors, grounding clip, and a wall plate. A ceiling fan requires a fan-rated electrical box, wire connectors, mounting bracket, and potentially a canopy.
3.Research Prices: Once you know the types and quantities of accessories you need, start researching prices. Check online retailers like Amazon, Home Depot, and Lowe’s. Visit local electrical supply houses for potentially better deals, especially on bulk purchases.
4.Create a Spreadsheet: Organize your findings in a spreadsheet. List each accessory, the quantity required, the unit price, and the total cost. This spreadsheet will give you a clear overview of your estimated accessory costs.
5.Add a Contingency: It's always a good idea to add a contingency (typically 10-15%) to your estimate to account for unexpected costs or errors in your calculations.
Example Scenario: Estimating Accessory Costs for a Bedroom Rewire
Let's illustrate the estimation process with a simple example. Suppose you're rewiring a bedroom and plan to install the following:
6 Standard Outlets
1 Ceiling Fan
1 Light Switch
Here's a possible breakdown of the accessory costs:
| Accessory | Quantity | Unit Price (Estimated) | Total Cost |
|---|---|---|---|
| ------------------------------ | -------- | ------------------------ | ---------- |
| Electrical Boxes (Standard) | 7 | \$2.00 | \$14.00 |
| Electrical Box (Fan-Rated) | 1 | \$8.00 | \$8.00 |
| Wire Connectors (Bag of 100) | 1 | \$10.00 | \$10.00 |
| Grounding Clips (Bag of 25) | 1 | \$5.00 | \$5.00 |
| Wall Plates (Standard) | 7 | \$1.50 | \$10.50 |
| Mounting Bracket (Ceiling Fan) | 1 | \$5.00 | \$5.00 |
| Cable Staples (Box of 100) | 1 | \$6.00 | \$6.00 |
| Subtotal | \$58.50 | ||
| Contingency (10%) | \$5.85 | ||
| Total Estimated Cost | \$64.35 |
This example demonstrates how breaking down the project into smaller components makes the estimation process more manageable. Remember to adjust the quantities and prices based on your specific needs and local market conditions.
Additional Cost Considerations
Beyond the basic accessories, there are other cost factors to consider that can impact your overall budget: Permits: Depending on your location and the scope of your project, you may need to obtain electrical permits. Permit fees can vary significantly. Inspection Fees: After the electrical work is completed, it will likely need to be inspected by a qualified electrical inspector. Inspection fees are another cost to factor in. Specialty Tools: While many basic electrical tasks can be performed with common tools, some projects may require specialized tools like wire strippers, voltage testers, or fish tape. If you don't already own these tools, you'll need to purchase or rent them. Unexpected Issues: During the project, you may encounter unexpected issues like damaged wiring or hidden code violations. These issues can require additional materials and labor, adding to your costs. A healthy contingency fund is crucial.
Labor vs Materials: Weighing the DIY Option
A significant factor affecting your overall project cost is whether you choose to DIY the electrical work or hire a licensed electrician. While DIY can save you money on labor costs, it's crucial to honestly assess your skills and knowledge. Electrical work can be dangerous, and improper wiring can lead to fires, shocks, or even death.
If you're comfortable with basic electrical tasks and have a good understanding of electrical codes, you may be able to handle some of the simpler aspects of the project yourself, such as replacing outlets or switches. However, for more complex tasks like running new circuits or working in your electrical panel, it's always best to hire a qualified electrician. The long-term safety benefits are usually worth the investment. Remember to check your local regulations regarding what electrical work homeowners are permitted to perform.
Hiring an electrician will increase your overall cost due to labor charges, but you gain the peace of mind knowing that the work is being done safely and correctly by a professional.
People Also Ask (FAQs)
What are the most common wiring accessories needed for a basic outlet installation? Typically, you'll need an electrical box (plastic or metal), wire connectors (wire nuts or Wago connectors), a grounding clip (if the box is plastic), and a wall plate. You'll also need the appropriate length of electrical wire (NM cable) to connect the outlet to the circuit.
Can I save money by using cheaper wiring accessories? While it may be tempting to save money by using cheaper accessories, it's generally not recommended. Lower-quality accessories may not be as durable or reliable, and they may not meet safety standards. Investing in quality accessories will ensure a safer and longer-lasting electrical system.
How do I know what type of electrical box to use? The type of electrical box you need depends on the application. For standard outlets and switches, you can typically use plastic or metal boxes. For ceiling fans and heavy light fixtures, you'll need a fan-rated electrical box that is designed to support the weight. When in doubt, consult with a qualified electrician or refer to your local electrical code.
Energy-Efficient Wiring Considerations
While you're planning your wiring project, consider incorporating energy-efficient wiring practices. This might include using thicker gauge wiring to reduce energy loss, installing occupancy sensors to automatically turn off lights in unoccupied rooms, or using LED lighting throughout your home. These investments can save you money on your energy bills in the long run and reduce your environmental impact. Talk to your electrician about options for energy-efficient wiring.
By carefully considering the types of wiring accessories you need, researching prices, and creating a detailed budget, you can confidently estimate the costs associated with your electrical project. Remember to prioritize safety and consult with a qualified electrician when needed. With proper planning and execution, you can successfully complete your wiring project and enjoy a safe and reliable electrical system in your home. Take your time, double-check your work, and always prioritize safety above all else. You’ve got this!
Posting Komentar untuk "Estimating Wiring Accessories Costs"